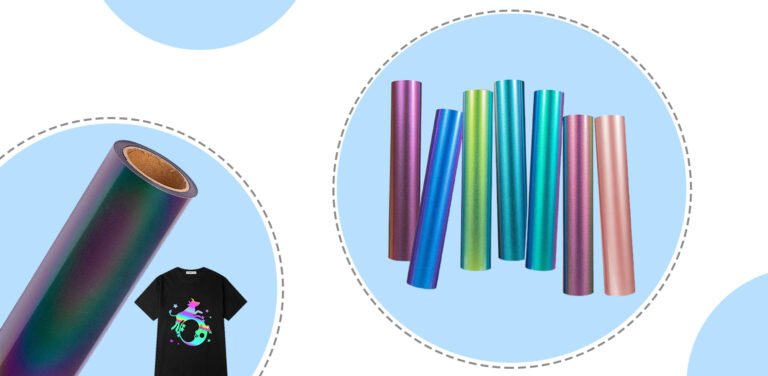
The Basics of Printable Heat Transfer Vinyl: A Beginner’s Guide
Printable heat transfer vinyl is a versatile material used for creating custom designs that can be transferred onto various fabrics and surfaces. It offers a convenient way to personalize clothing, accessories, and other items with unique graphics, logos, and artwork.
Here are some key points to understand about the basics of printable heat transfer vinyl:
1. Definition
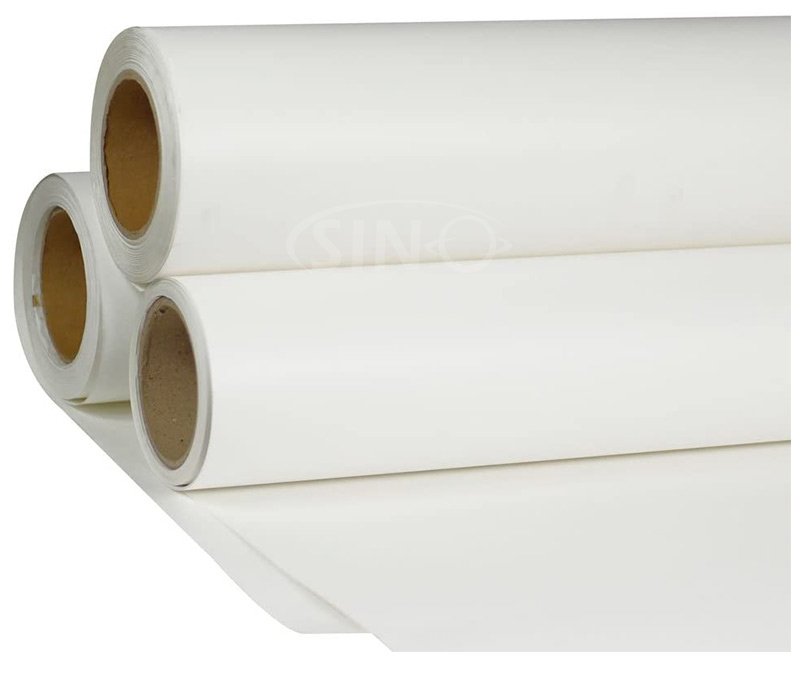
Printable heat transfer vinyl, often referred to as printable HTV, is a specialty vinyl material that can be printed on using a compatible inkjet printer. The printed design is then cut and applied to the desired surface using heat.
2. Compatibility
Printable heat transfer vinyl works best with inkjet printers, as they use a water-based ink that bonds well with the vinyl material. It is important to ensure that your printer is compatible with printable vinyl before proceeding.
3. Design and Printing
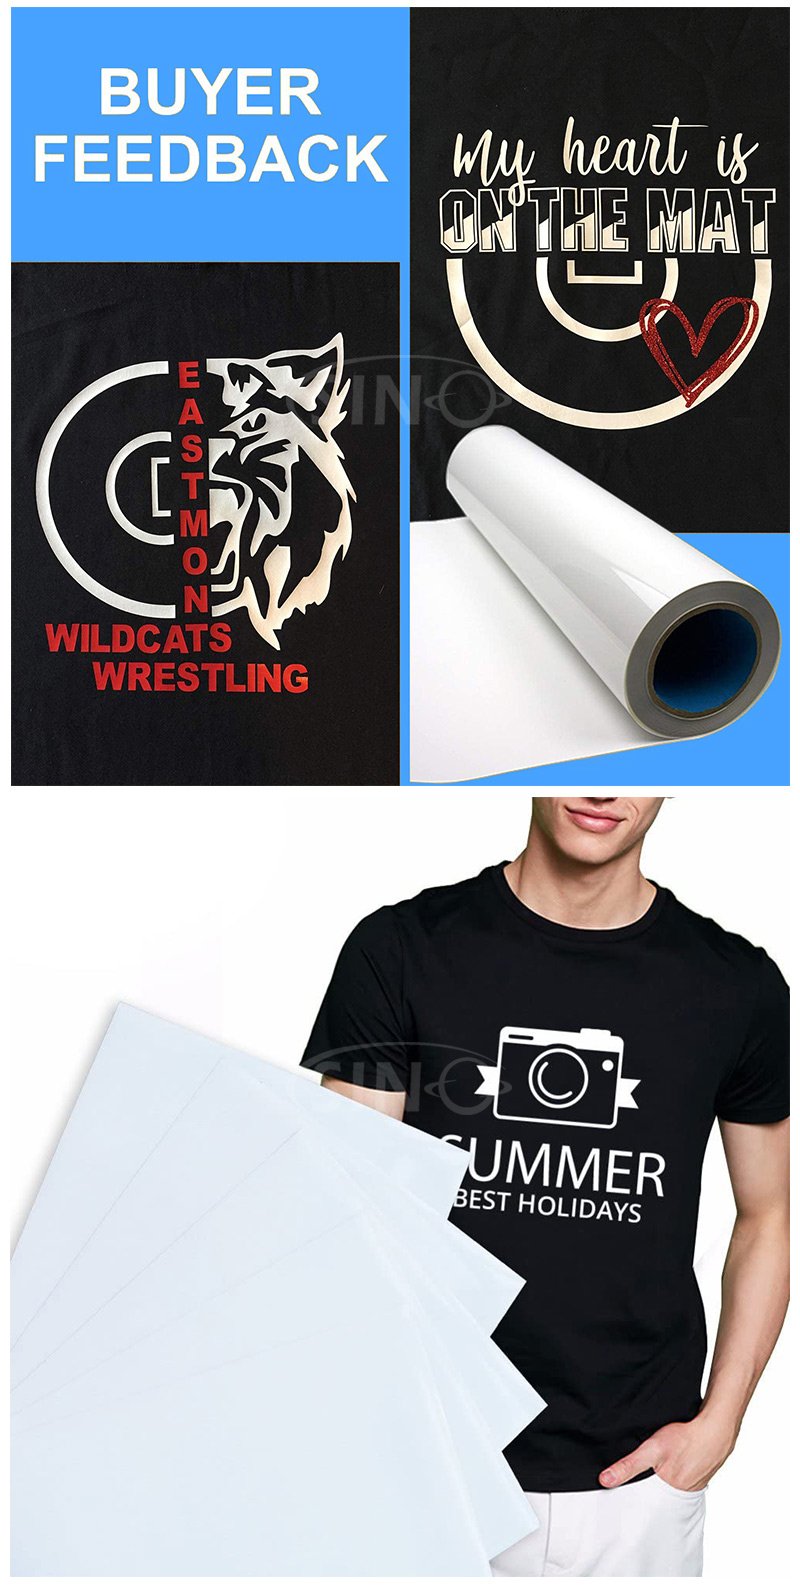
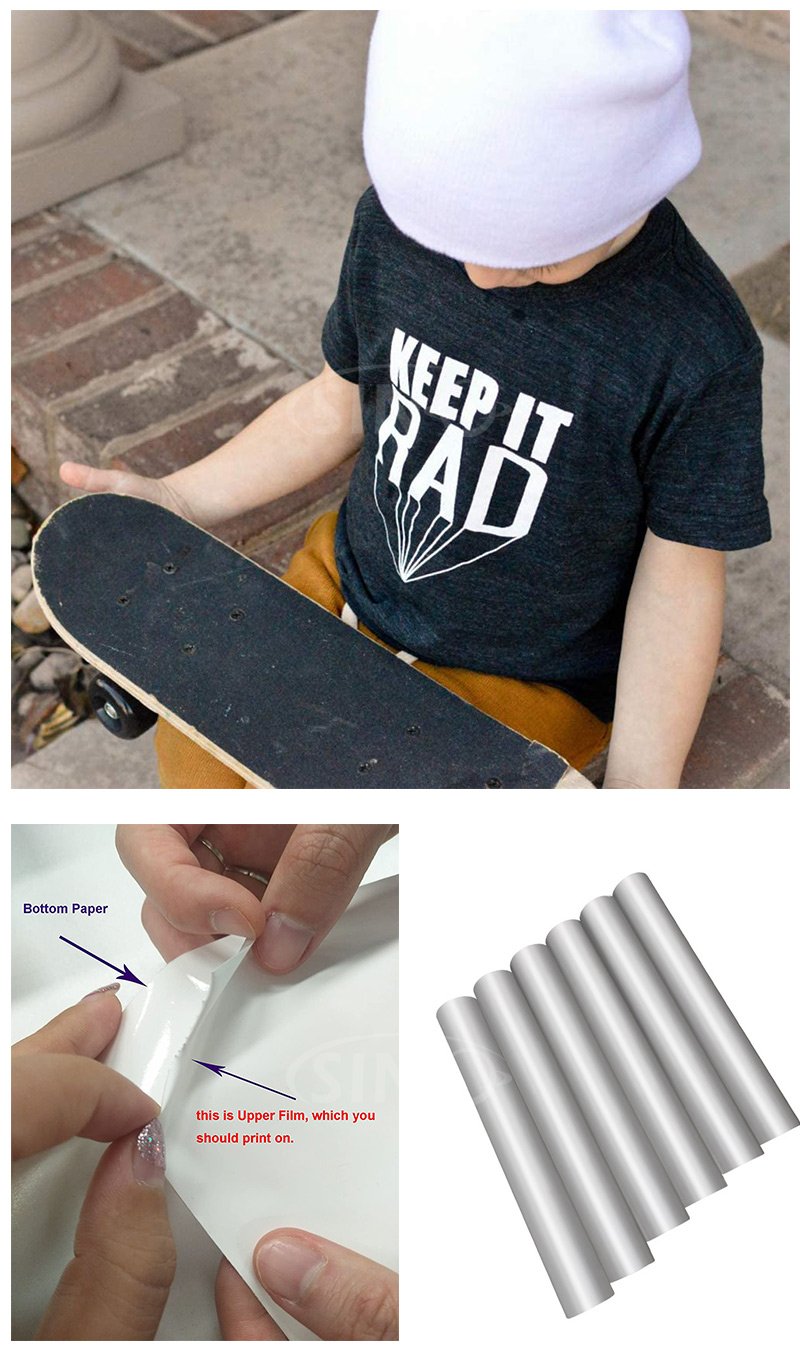
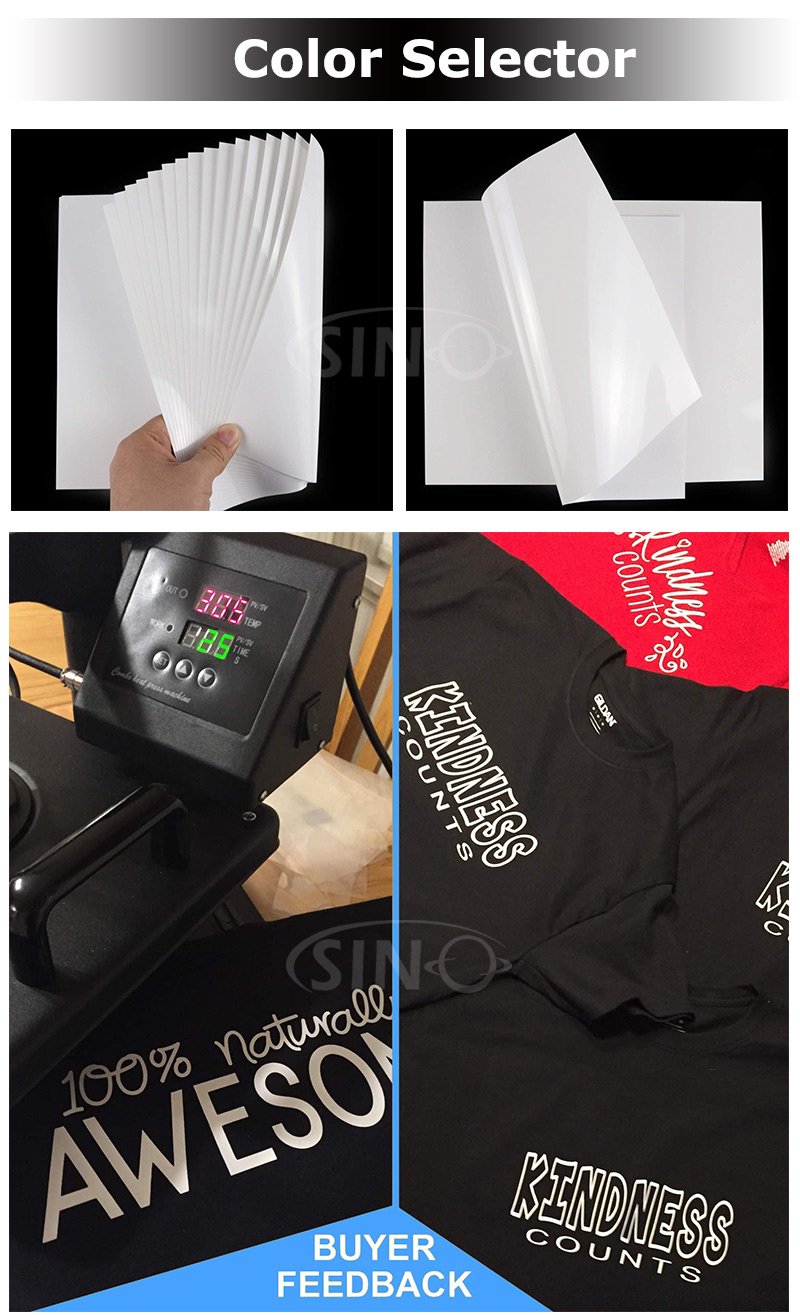
To create a design, you can use graphic design software or choose from various online platforms that offer pre-designed templates. Once your design is ready, print it onto the printable heat transfer vinyl sheet, making sure to mirror the image (flip horizontally) before printing.
4. Cutting
After printing, the next step is to cut out the design using a vinyl cutter or craft cutting machine. Most printable heat transfer vinyl sheets have a backing that makes it easier to load and cut with precision.
5. Weeding
Once the design is cut, you need to remove the excess vinyl material surrounding the printed image. This process is called weeding and is typically done using a weeding tool or tweezers. Be careful not to damage the design during this step.
6. Application
After weeding, you are ready to apply the design to the fabric or surface. Place the cut design onto the desired area and apply heat using a heat press or iron, following the manufacturer’s instructions. The heat activates the adhesive on the vinyl, allowing it to adhere to the fabric.
7. Peeling
Once the vinyl has cooled down, carefully peel off the transfer sheet or backing, leaving behind the transferred design on the fabric. Take your time and peel slowly to avoid damaging the design.
8. Care and Maintenance
It is important to follow the specific care instructions for the type of printable heat transfer vinyl used. Generally, it is recommended to wash the garment or item inside out, using mild detergent and cold water. Avoid using bleach or harsh chemicals that can degrade the vinyl.
By understanding these basics of printable heat transfer vinyl, you can start exploring your creativity and bring custom designs to life on various fabrics and surfaces. Remember to experiment, practice, and have fun with this versatile and exciting material.
Tips and Techniques for Printing on Printable Heat Transfer Vinyl
1. Use a High-Quality Printer
Invest in a good quality printer that produces vibrant and accurate colors. An inkjet printer with pigment-based inks is recommended for the best results.
2. Adjust Printer Settings
Set your printer to the highest quality print mode and ensure it is calibrated correctly. Adjust the print settings according to the manufacturer’s instructions for the specific printable heat transfer vinyl you’re using.
3. Mirror the Design
Before printing, remember to horizontally flip or mirror your design. This is crucial because you will be transferring the design onto the garment or fabric in reverse.
4. Test Prints
Always perform test prints on regular paper before printing on the actual printable heat transfer vinyl. This allows you to verify colors, size, and positioning of the design before committing to the vinyl.
5. Optimize Design Resolution
Ensure your design has a high resolution (at least 300 dpi) to maintain sharpness and clarity when transferred onto the fabric.
6. Trim Excess Vinyl
Once the design is printed and dried, carefully trim away any excess vinyl around the design. This helps to reduce bulk and ensures precise placement on the fabric.
7. Use a Cutting Mat
Place a cutting mat or protective surface underneath the printable heat transfer vinyl while trimming. This prevents damage to your work surface and provides a smooth cutting experience.
8. Weed the Design
After trimming, weed out the unnecessary vinyl using a weeding tool or tweezers. Remove the parts of the vinyl that you do not want to transfer, such as the background or small inner details of the design.
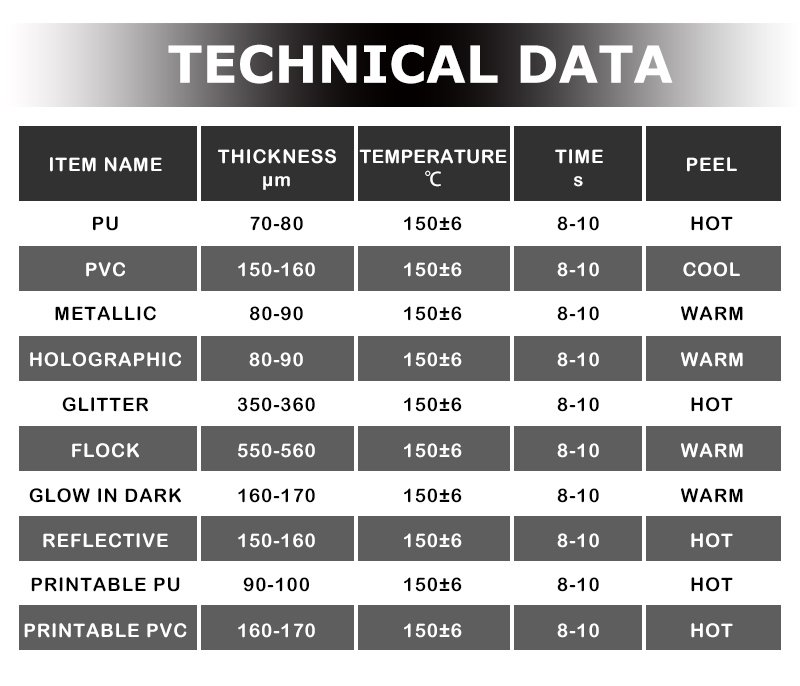
9. Heat Press Temperature and Time
Refer to the instructions provided by the manufacturer for the recommended temperature and time settings for your printable heat transfer vinyl. Ensure your heat press is heated to the correct temperature and adjust the pressure accordingly.
10. Peel Hot or Cold
Depending on the type of printable heat transfer vinyl, you may need to peel the backing either while the vinyl is still hot or after it has cooled down. Follow the manufacturer’s instructions to determine the appropriate peeling method.
11. Use a Teflon Sheet or Parchment Paper
To protect your design and heat press from direct contact, place a Teflon sheet or parchment paper on top of the vinyl before applying heat. This prevents any unwanted transfer of ink or damage to the vinyl.
12. Apply Even Pressure
When using a heat press, make sure to apply even pressure to ensure a consistent transfer of the design onto the fabric. Uneven pressure may result in incomplete or distorted transfers.
13. Post-Transfer Care
Allow the fabric to cool completely before removing the backing entirely. Follow the manufacturer’s instructions for washing and caring for garments or items decorated with printable heat transfer vinyl.
14. Test Washability
Before selling or gifting an item, it’s always a good idea to test its washability. Wash the garment or fabric according to the recommended instructions for the specific printable heat transfer vinyl to ensure the design stays intact.
15. Practice and Experiment
Like any craft, practice makes perfect. Experiment with different designs, colors, and types of printable heat transfer vinyl to discover new techniques and create unique projects.
Remember to consult the specific instructions provided by the manufacturer of your chosen printable heat transfer vinyl for the best results.
Step-by-Step Tutorial: How to Apply Printable Heat Transfer Vinyl to Fabric
Materials you’ll need
- Printable heat transfer vinyl
- Inkjet printer
- Cutting machine (optional)
- Scissors or craft knife
- Weeding tool
- Heat press or iron
- Parchment paper or Teflon sheet
- Fabric to apply the vinyl on
- Hard surface or ironing board
Step 1: Design and Print
- Create or select the design you want to apply using graphic design software or online platforms.
- Mirror the design horizontally using the software or printer settings.
- Load the printable heat transfer vinyl into your inkjet printer.
- Print the design onto the vinyl sheet. Allow the ink to dry completely.
Step 2: Cut the Design (if applicable)
- If you have a cutting machine, you can use it to cut around the design for precise results.
- Alternatively, you can carefully cut around the design using scissors or a craft knife. Leave a small border around the design to ensure easy handling.
Step 3: Weed the Excess Vinyl
- Using a weeding tool, gently peel away the excess vinyl around the design.
- Take your time to remove any small or intricate pieces of vinyl.
Step 4: Preparing the Fabric
- Preheat your heat press or iron to the appropriate temperature for the printable heat transfer vinyl and fabric you’re using. Refer to the manufacturer’s instructions for recommended settings.
- Place the fabric on a hard surface or ironing board, ensuring it is flat and wrinkle-free.
Step 5: Position and Secure the Design
- Carefully position the weeded vinyl design onto the fabric, ensuring it is centered and aligned as desired.
- If you have multiple layers or colors, layer them one by one, starting with the bottom layer and working your way up.
- Once positioned, use heat-resistant tape to secure the vinyl in place temporarily.
Step 6: Heat Application
- Cover the design and fabric with a sheet of parchment paper or Teflon sheet to protect it from direct heat.
- Using your heat press or iron, apply firm and even pressure to the design for the recommended duration. Follow the manufacturer’s instructions for time and temperature guidelines.
- If using an iron, apply pressure using both hands and make sure to cover the entire design area.
Step 7: Peel and Finish
- While the vinyl is still warm (but not hot), carefully peel off the clear carrier sheet from the fabric. Start from one corner and peel at a 45-degree angle.
- If any parts of the vinyl lift with the carrier sheet, lay it back down and apply more heat and pressure.
- Allow the fabric to cool completely before handling or wearing the finished product.
That’s it! You’ve successfully applied printable heat transfer vinyl to fabric. Enjoy your customized creation and showcase your creativity!

Common Mistakes to Avoid When Using Printable Heat Transfer Vinyl
When using printable heat transfer vinyl, it’s important to be aware of common mistakes to avoid to ensure successful and professional-looking results. Here are some common mistakes to watch out for:
1. Incorrect temperature settings
Using the wrong temperature settings can result in poor adhesion or damage to the vinyl. Always refer to the manufacturer’s instructions for the recommended temperature settings and make sure your heat press or iron is properly calibrated.
2. Insufficient pressure
Insufficient pressure during the heat transfer process can lead to incomplete bonding between the vinyl and the fabric. Make sure to apply sufficient pressure evenly across the design area to ensure proper adhesion.
3. Improper peeling technique
Peeling the carrier sheet too quickly or too slowly can affect the quality of the transfer. Follow the recommended instructions for peeling the carrier sheet, whether it’s a hot peel or a cold peel, to avoid damaging the design or causing it to lift.
4. Using the wrong fabric or surface
Printable heat transfer vinyl is designed to work on specific fabrics and surfaces. Using the wrong type of fabric or applying the vinyl to surfaces that are not suitable can result in poor adhesion or a failed transfer. Always check the compatibility of the vinyl with the fabric or surface you are working with.
5. Not allowing sufficient cooling time
Rushing to peel the carrier sheet or handle the garment immediately after heat pressing can cause the design to distort or peel off. Allow the transfer to cool completely according to the manufacturer’s instructions before peeling off the carrier sheet or handling the item.
6. Failing to perform a test transfer
Before applying the printable heat transfer vinyl to your final project, it’s crucial to perform a test transfer on a spare fabric or item. This allows you to check the settings, colors, and adhesion before committing to the actual project, helping you avoid any potential issues or mistakes.
7. Stretching or distorting the fabric during application
Tugging or stretching the fabric while applying the heat transfer vinyl can result in uneven or distorted designs. Ensure the fabric is flat and properly positioned before pressing the vinyl to achieve a clean and professional look.
8. Neglecting proper care instructions
Each brand of printable heat transfer vinyl may have specific care instructions, such as washing inside out or avoiding harsh detergents or bleach. Failure to follow these instructions may cause the design to fade or peel prematurely.
By being mindful of these common mistakes and taking the necessary precautions, you can achieve excellent results with printable heat transfer vinyl and avoid potential setbacks or issues.
(Click the picture to learn more)
Final Words
In conclusion, printable heat transfer vinyl opens up a world of creative possibilities, allowing you to unlock your artistic potential and bring your unique designs to life. With this comprehensive guide, you now have the knowledge and understanding to venture into the realm of personalized apparel, custom crafts, and branded merchandise. By avoiding common mistakes, following proper techniques, and experimenting with different design ideas, you can elevate your creativity and create stunning, professional-looking results. So, embrace the versatility of printable heat transfer vinyl, let your imagination soar, and embark on a journey of self-expression and limitless artistic opportunities. Get ready to showcase your creativity and make a lasting impression with the power of printable heat transfer vinyl!